Azure VMware Solution: Nested ESXi
By: Trevor Davis (Microsoft)
Nested ESXi is very useful for multiple reasons, can’t even begin to guess how many times I’ve done this and been able to demo something, test something, etc.. But keep in mind this is not supported by VMware, see this VMware KB article for the specific details. The supportability from VMware aside, nested ESXi works just fine and you can do this on Azure VMware Solution with relative ease… doesn’t get much better!! So let’s begin.
Segment Profile Creation
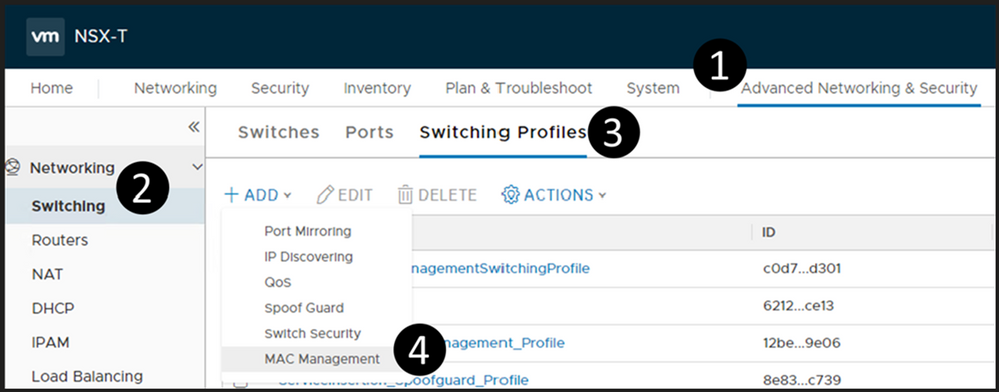
Log into your NSX manager in Azure VMware Solution and navigate your way to MAC Management as shown below.
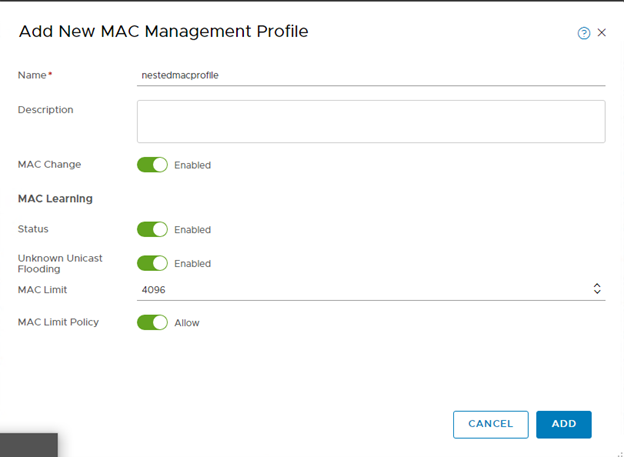
Create a new MAC Management profile. Make sure you configure it as outlined below. Of course, you can choose whatever name you would like.
Deploy a Segment
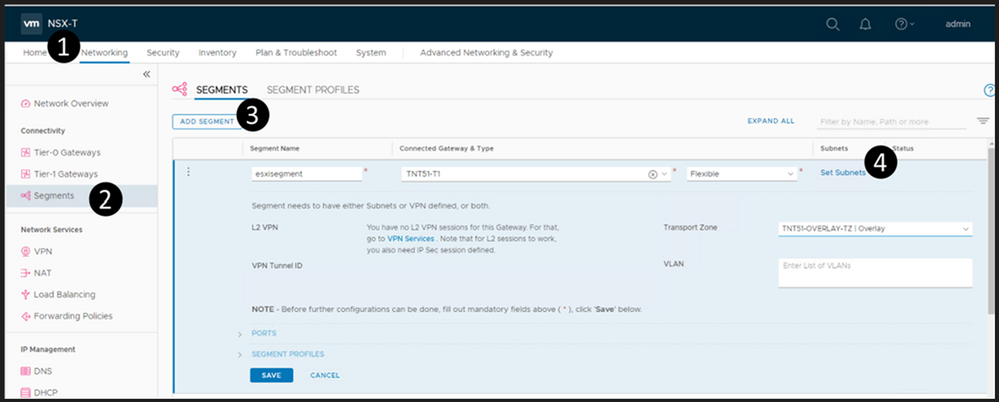
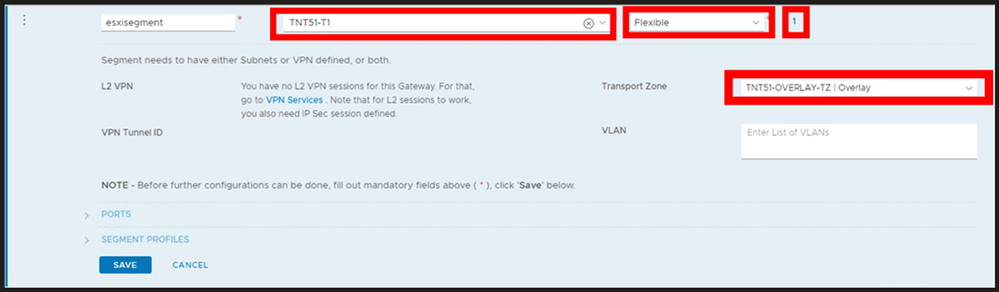
The segment will be the network segment where you will have your ESXi vNIC(s) attached. You can have one segment or multiple, the critical thing here is for every segment created, create it as shown below.
Do steps 1-3 (DO NOT DO STEP 4 YET), then fill in as shown here, name it whatever you like. DO NOT Save.
Now, select Set Subnets (#4 from above)
Define whatever subnet you would like, you should end up with a screen as shown below. Then Apply.
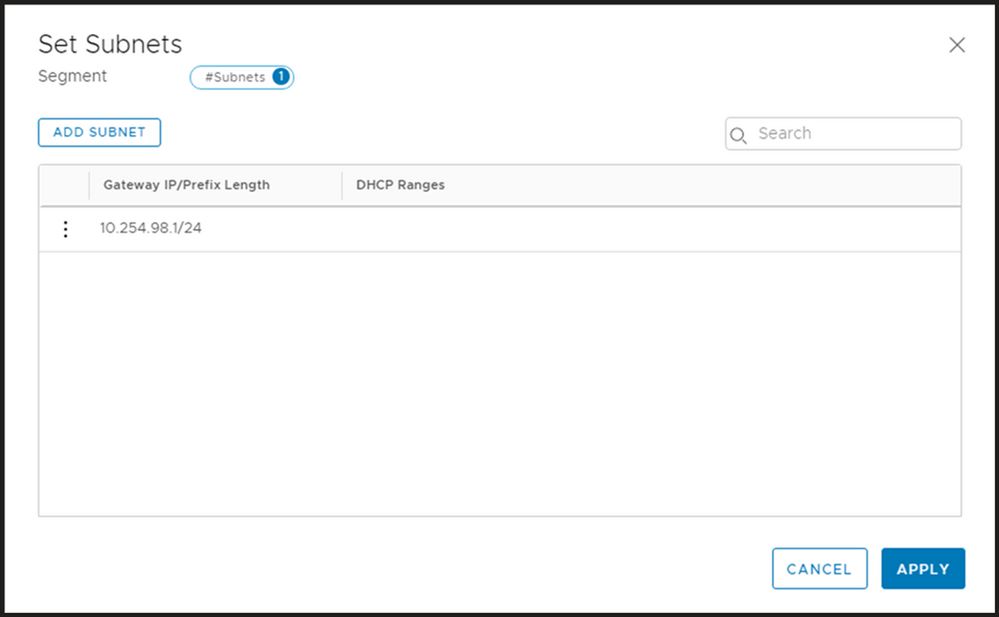
Your screen should look like the picture below, if it does, then choose Save.
You should now be prompted as shown below, choose YES.

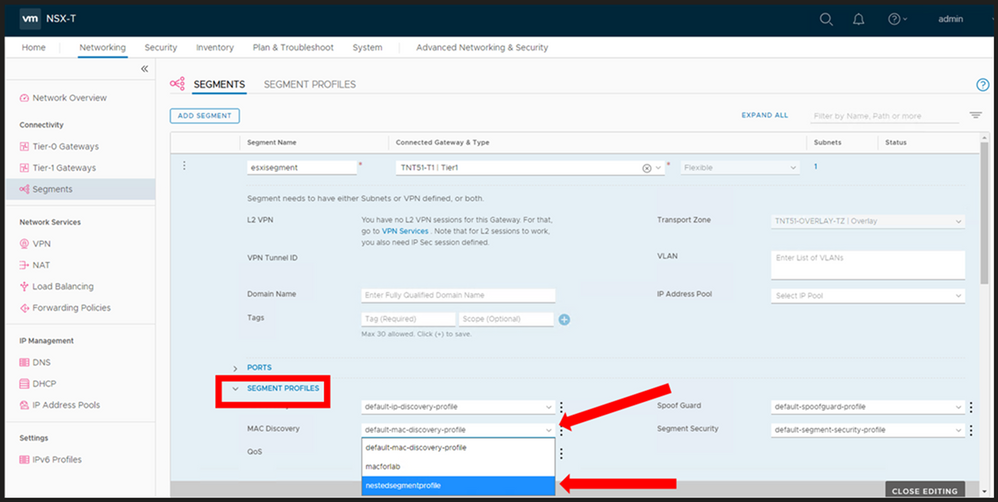
Now expand the segment profile section and change the MAC Discovery segment profile to the one which you just created and Save.
At this point you now have a NSX Segment (subnet) you can start to attach your ESXi hosts vNIC(s) to. Again, you may choose to deploy multiple segments, but this decision will be driven by your needs.
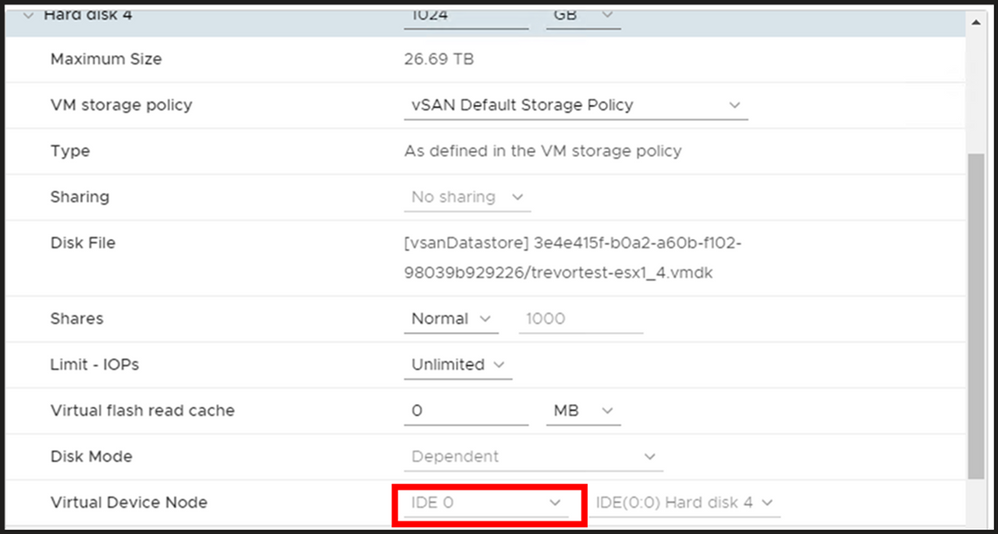
Nested ESXi Disk Requirement
In Azure VMware Solution I have found that you need to make your disk set to IDE. Any virtual hosts which get deployed needs to have their virtual device node changed to IDE.