Create a vCenter Content Library on Azure Blob Storage
By: Trevor Davis, Azure Global Blackbelt - Azure VMware Solution - @vTrevorDavis
Challenge
Azure VMware Solution Private Cloud as you may be aware is a hyper-converged VMware SDDC. Using vCenter Content Libraries of course is a widely used feature of vCenter and at times can be many hundred gigs.
Using the datastore on the Azure VMware Solution Private Cloud may not be the most efficient use of that high performance disk, also using the disk of the Private Cloud does not allow for the sharing of the content libraries across Azure VMware Solution Private Clouds.
To address this, consider using Azure Blob Storage to create a centralized vCenter Content Library. The process to do this is largely identical to what is outlined on William Lam’s Blog Post
Ok, so let us get started. We are going to create a centralized vCenter Content Library on Azure Blob Storage and connect that to Azure VMware Solution Private Cloud.
General Overview
At a high level, what we will be doing is creating the content library which consists of OVFs for template use and ISOs for VM creation on your local machine. There will be a script run against those files to prepare them for upload, then you will upload those files to Azure Blob Storage and create a Content Library backed by the Azure Blob upload.
Step 1 - Build Content Library on Local Disk
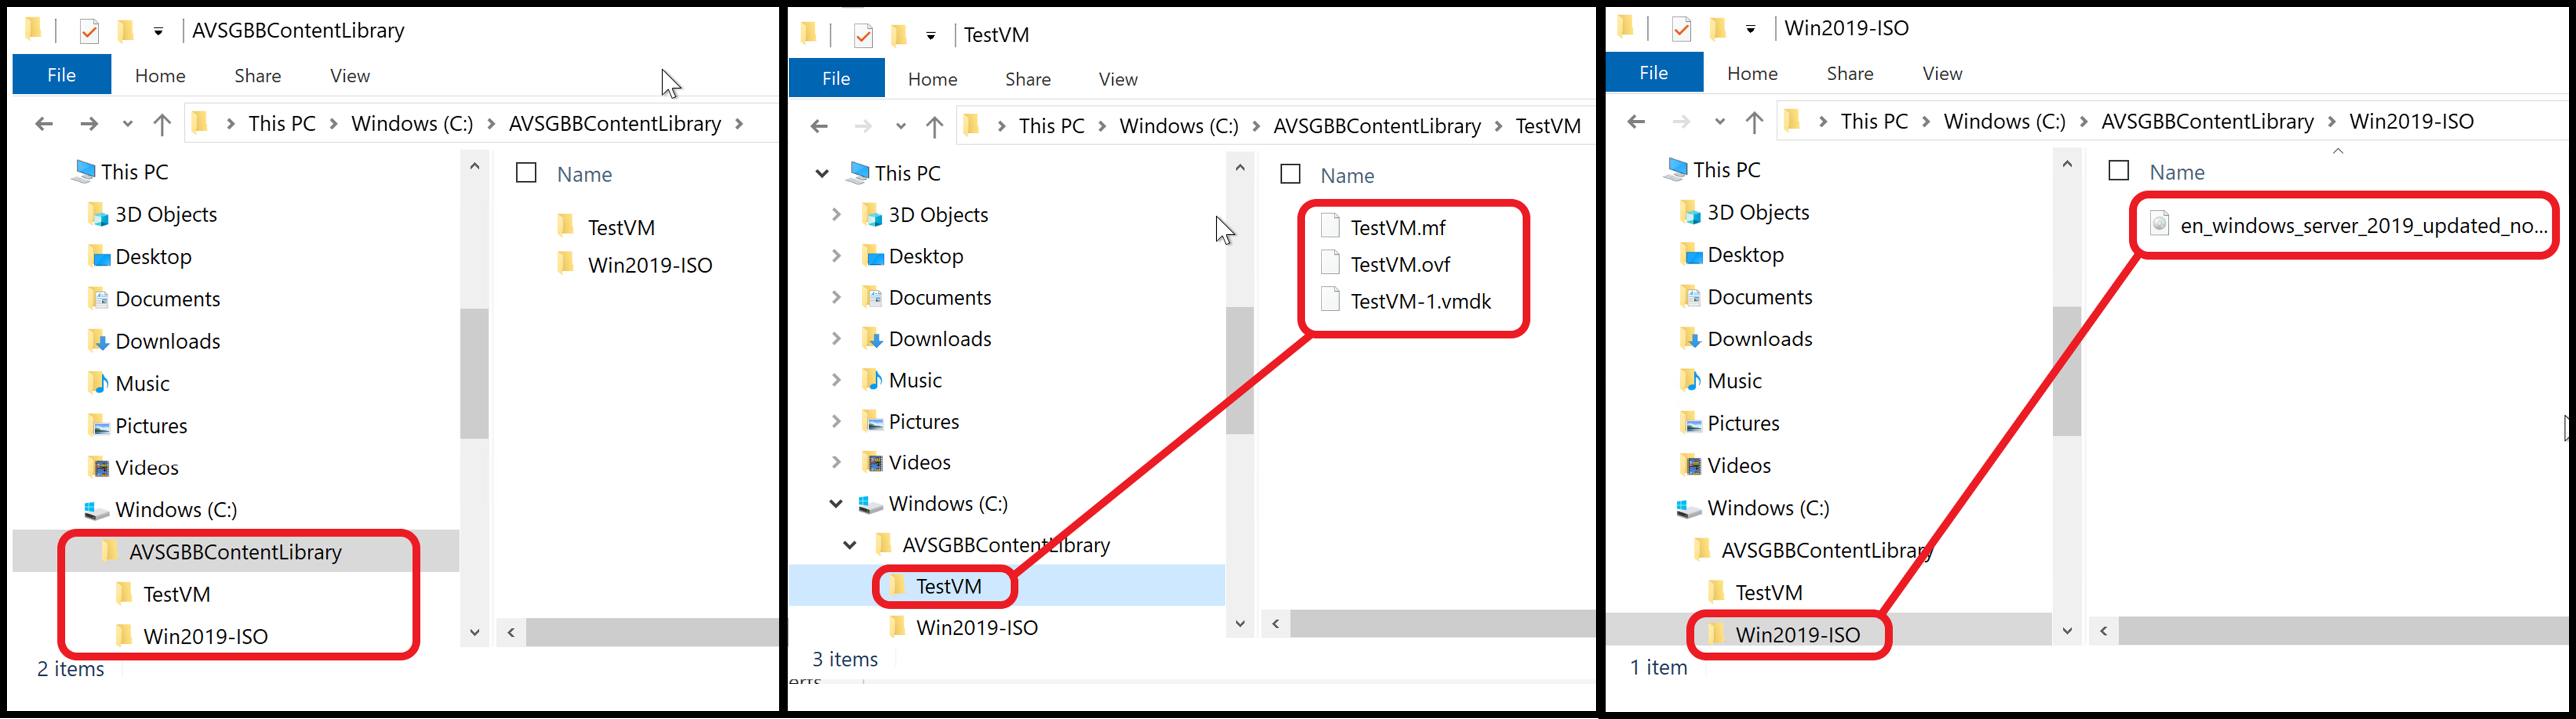
First thing which needs to be done is to build the content for your content library on your local disk. Here is an example of the file structure. The top level folder is called AVSGBBContentLibrary, your content library content will live within that folder. In the graphic below you see that each content library item will have it’s own folder, and within that folder the files which are relevant to that particular item.
In this example we have an ISO file in the Win2019-ISO folder and the VM Template in OVF format in the TestVM folder.
If you need guidance on how to export a VM from vCenter as an OVF template follow this link.
[NOTE] OVA files are not able to be consumed when using an external content library in this manner, so for all your VM templates use the OVF format.
Step 2 - Prepare Content Library on Local Disk
Now that you have your Content Library folder built on your local machine you will need to run a script against the root folder of the hierarchy. The script can be found here.
This script will need to run using python, what I did was download and install python on my windows machine and execute the following command against the root directory.

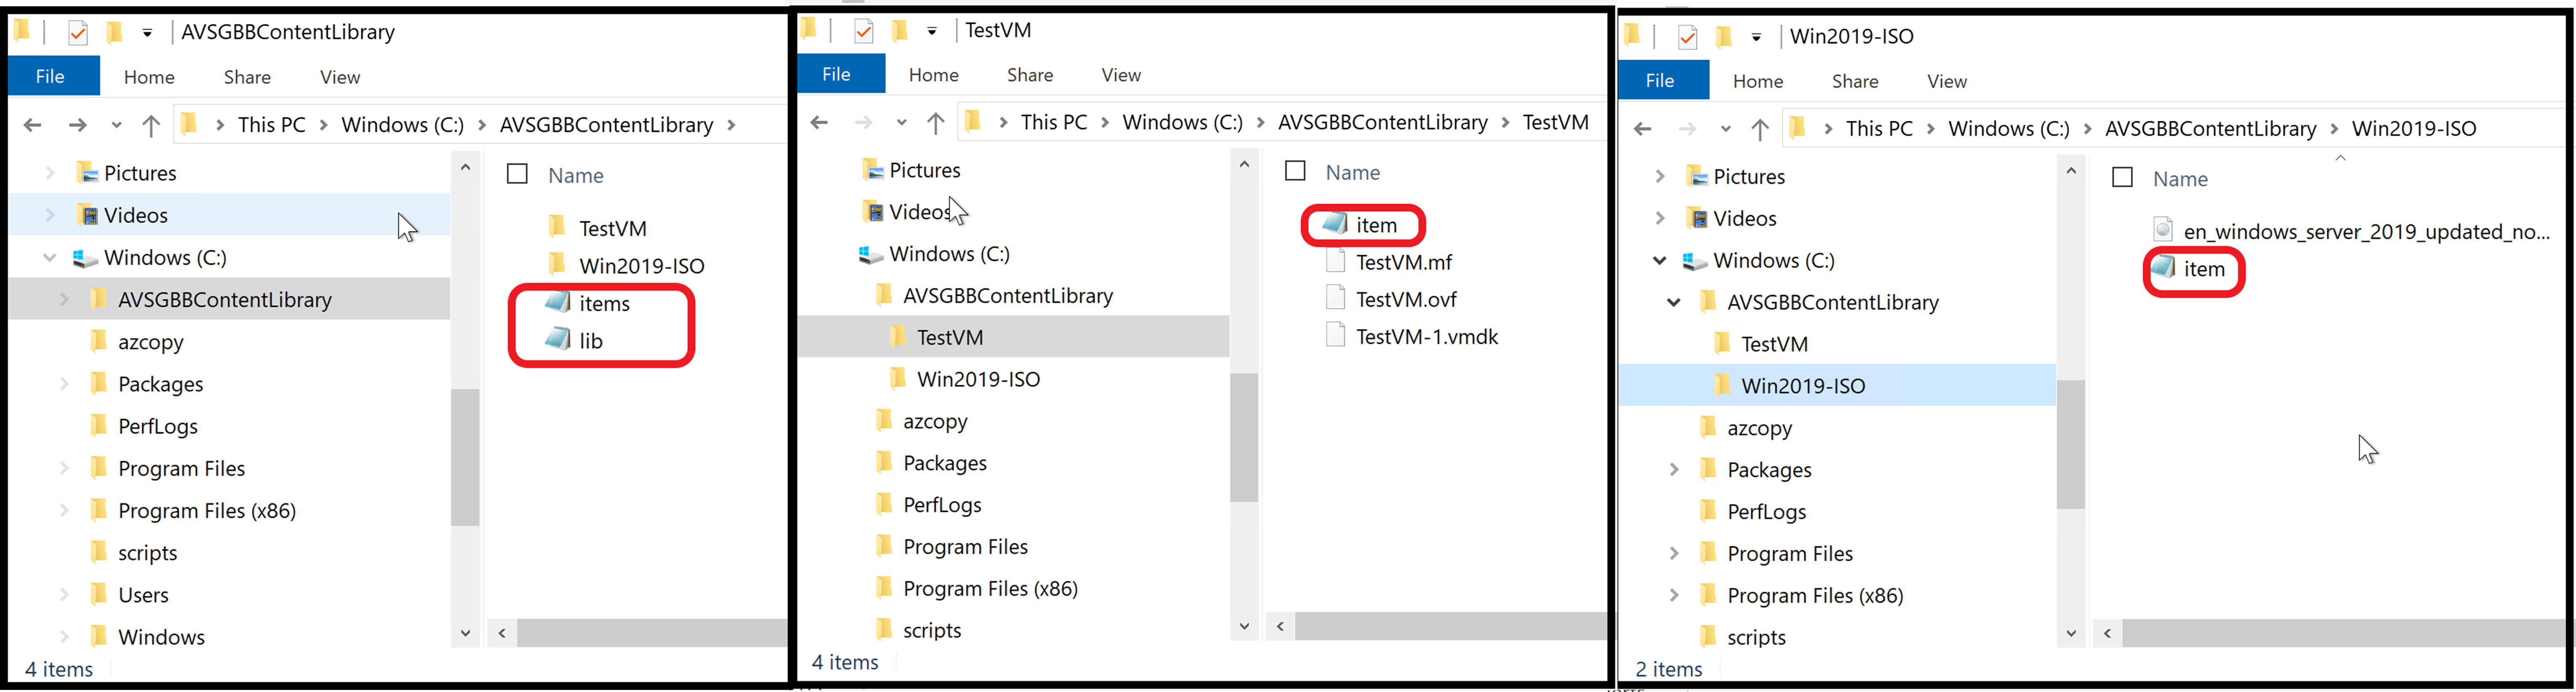
After running the script you will see additional files in the root directory, and each of the sub-directories, similar to what is shown below.
Step 3 - Prepare Azure Storage
The Content Library on your local machine is now prepped to be uploaded to Azure Blob Storage. Now you need to create a Storage Account and Blob Container.
If you have already have a storage account you want to use skip ahead to step 3.2 and if you also already have a Blob container you want to use in that storage account skip to Step 4.
Step 3.1 - Create Storage Account
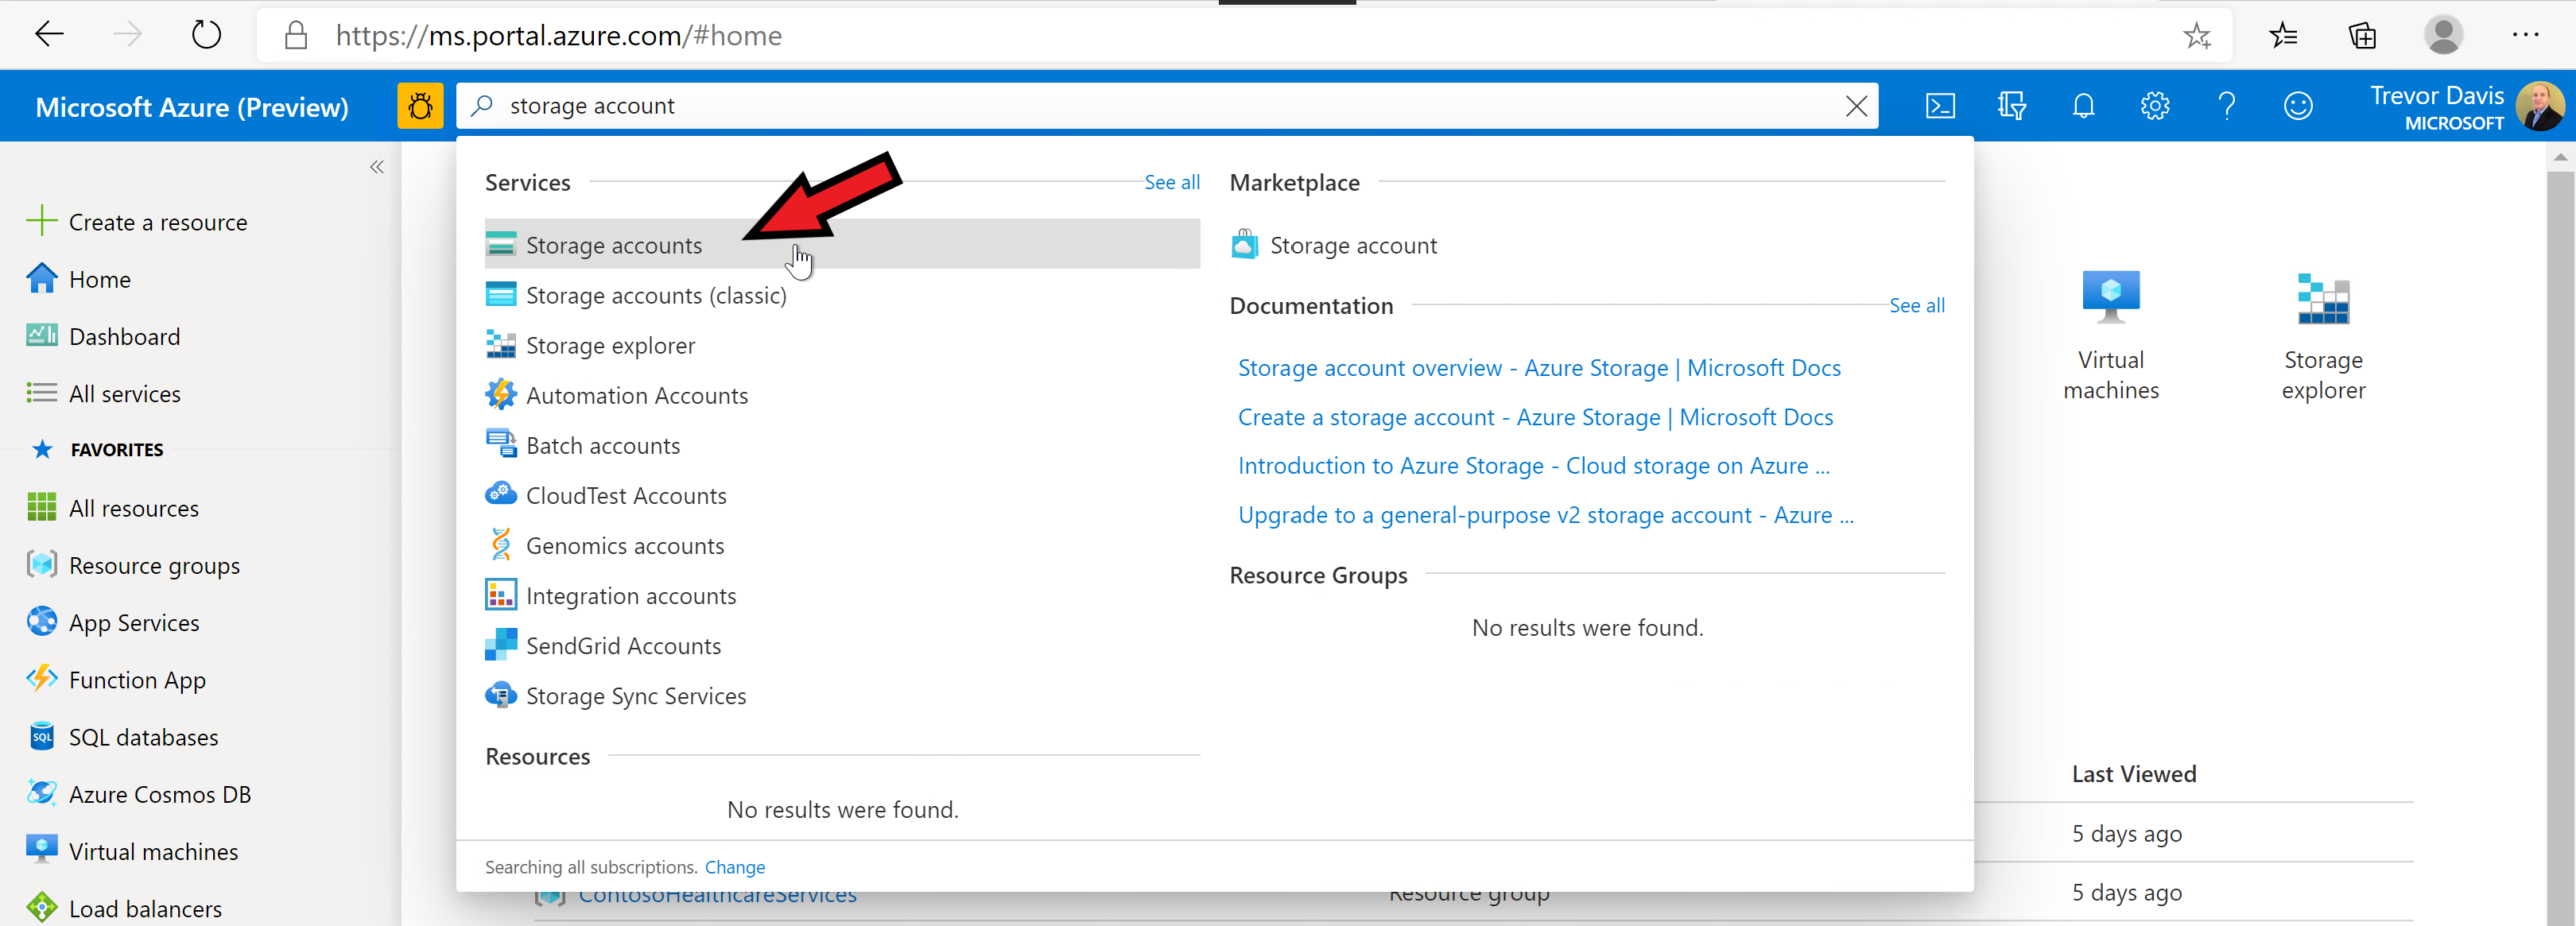
From the Azure portal search for storage accounts and select the item as shown in the screenshot below.
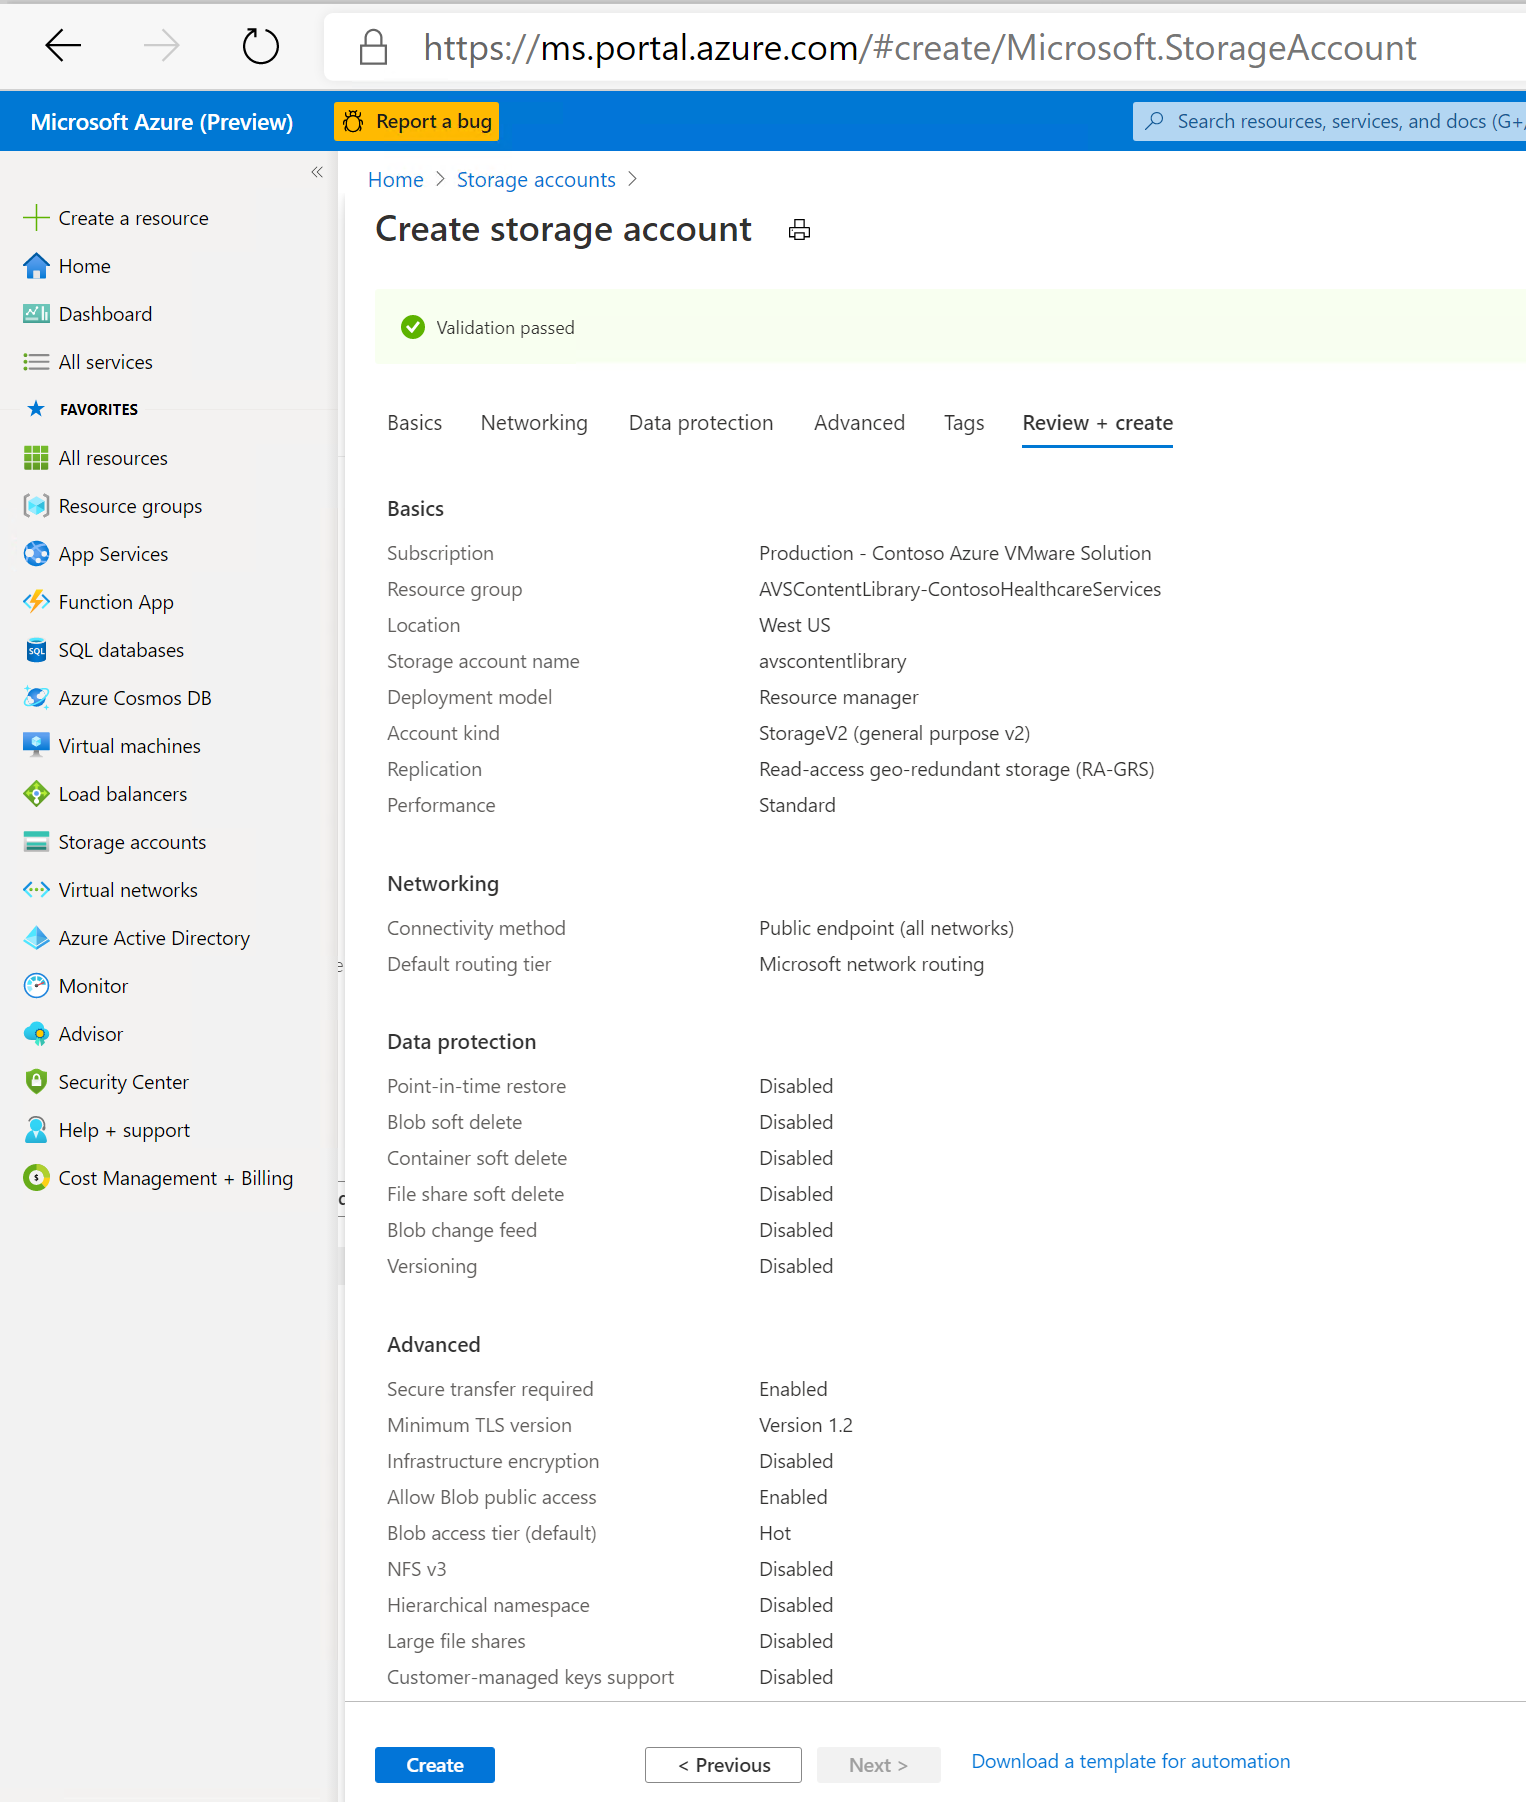
In the Create storage account screen choose the subscription and the resource group you want to use (or create a new one). Input a storage account name (any name you like) and choose the location where you want the storage account deployed (typically the same region as your Azure VMware Solution Private Cloud). In the subsequent screens I just kept all the defaults.
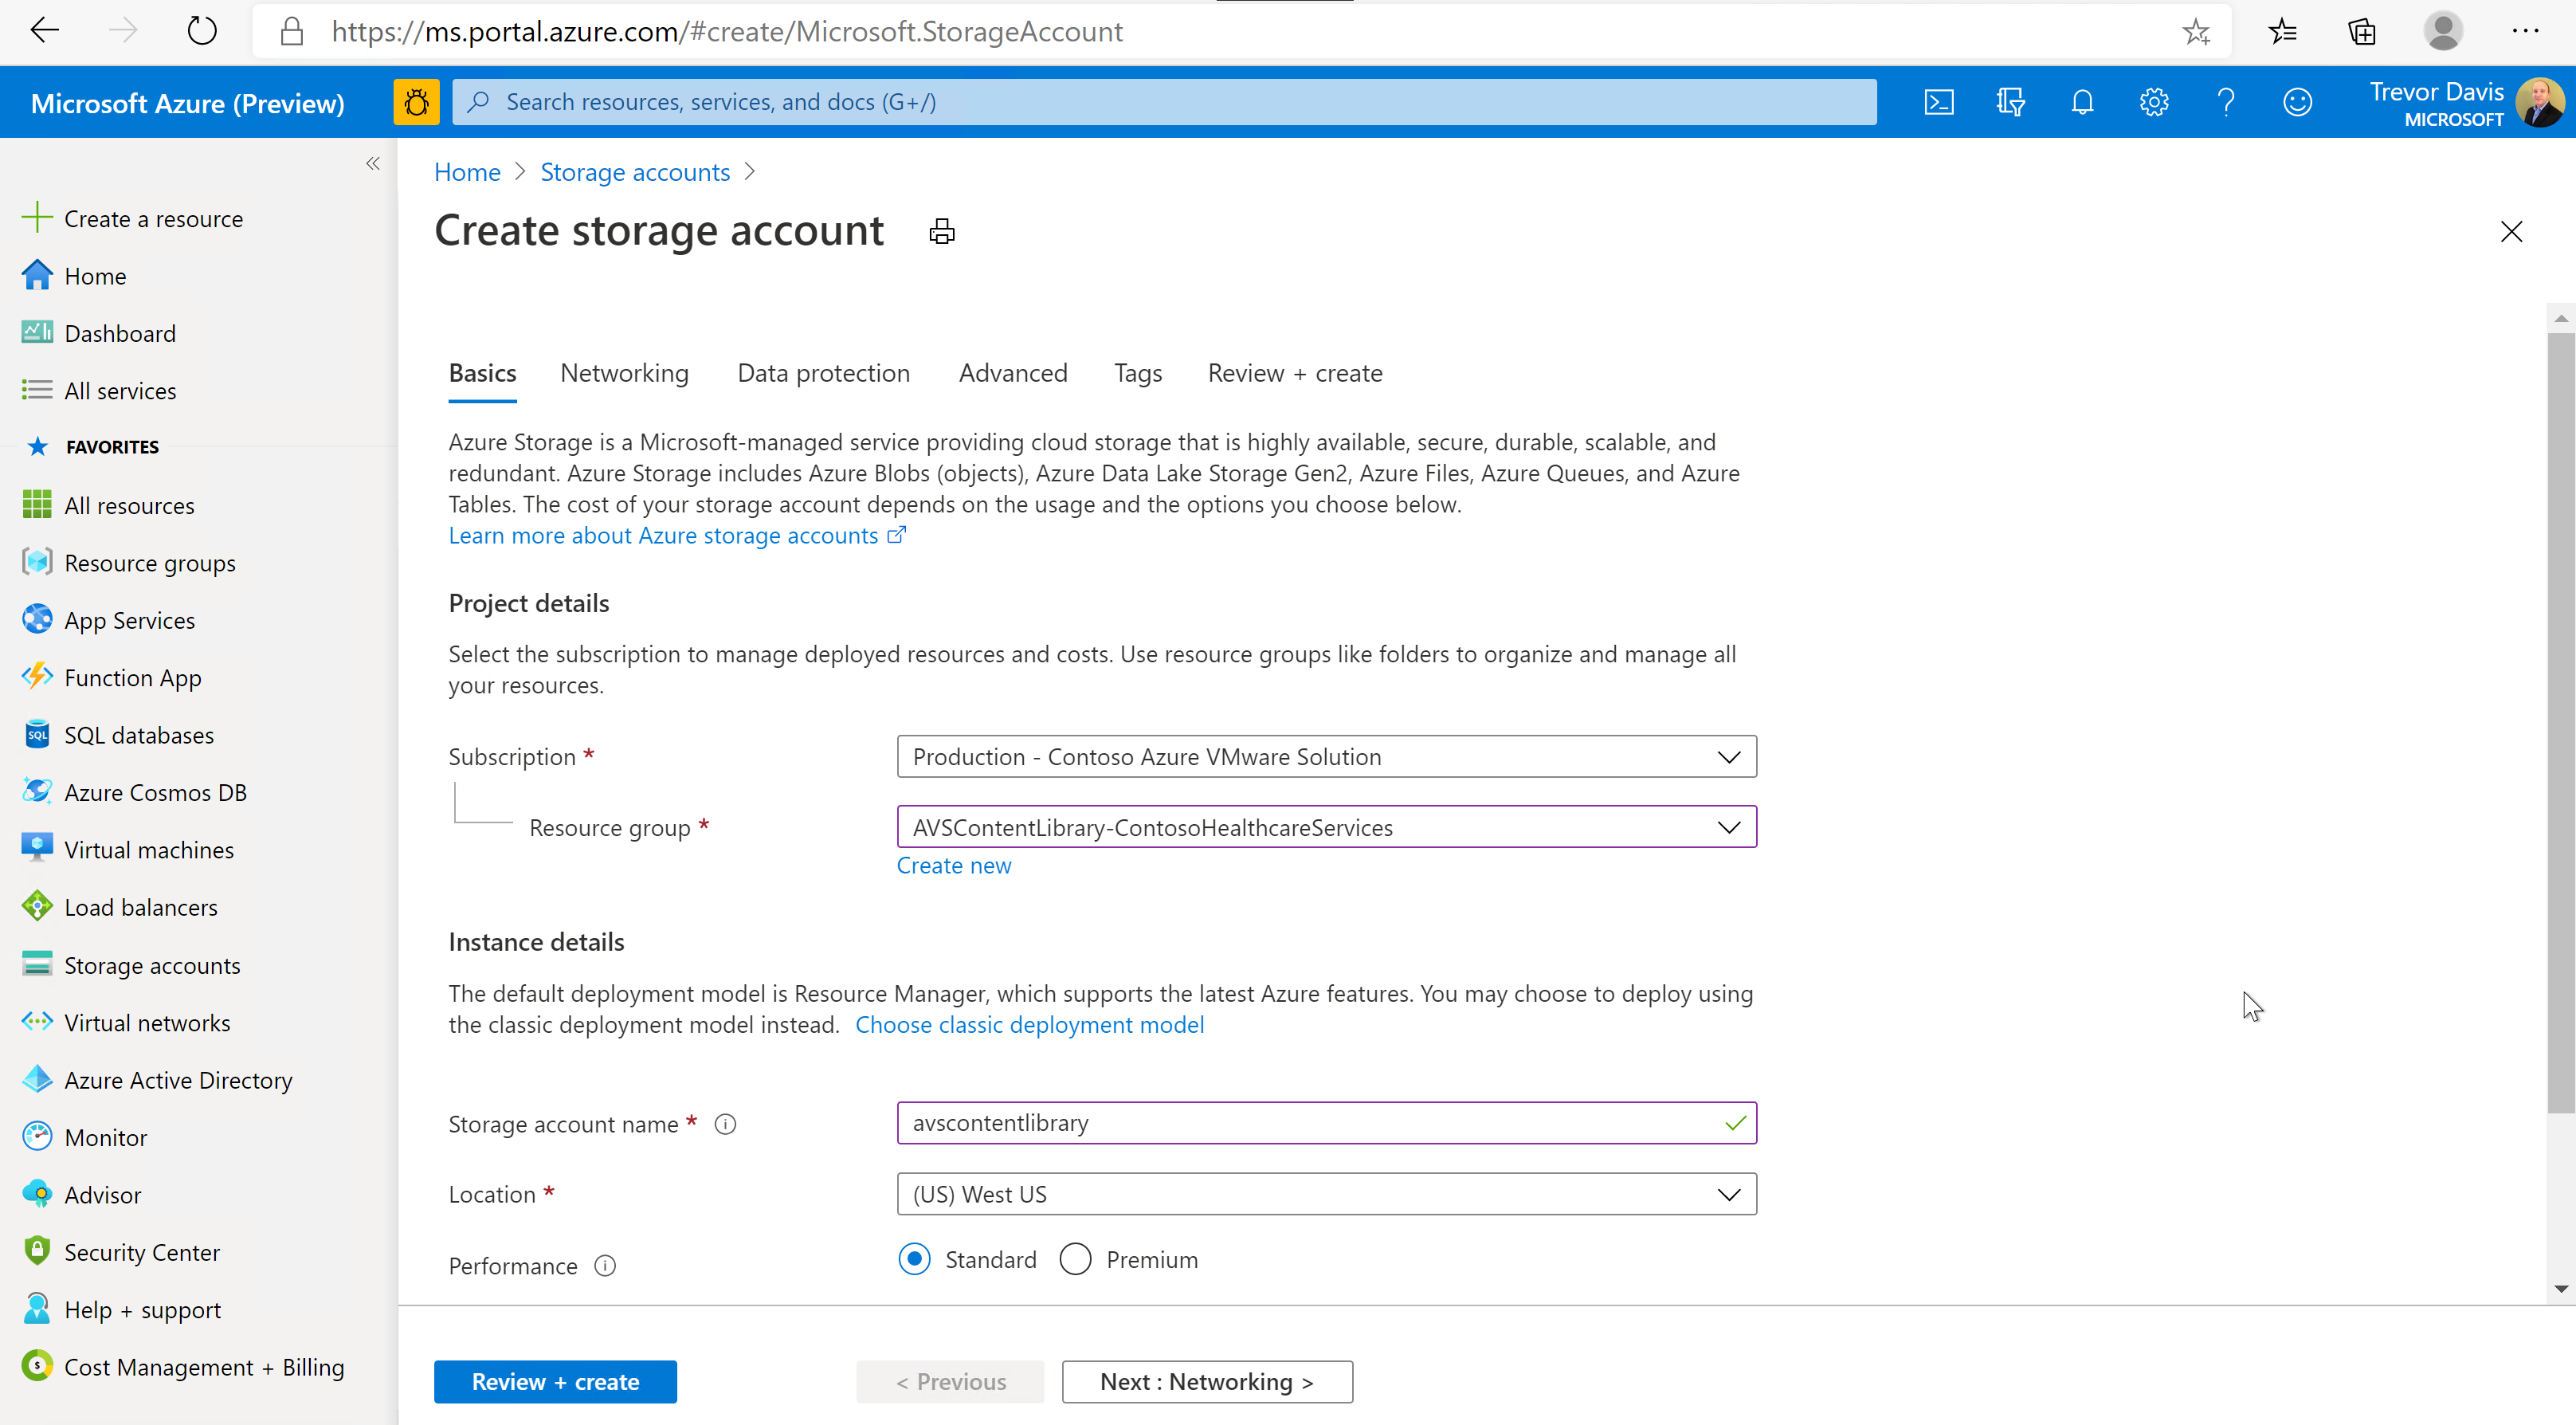
Here are all the configuration parameters I used. When you get to this screen just choose the Create button and the storage account will get created.
Step 3.2 - Create Blob Container
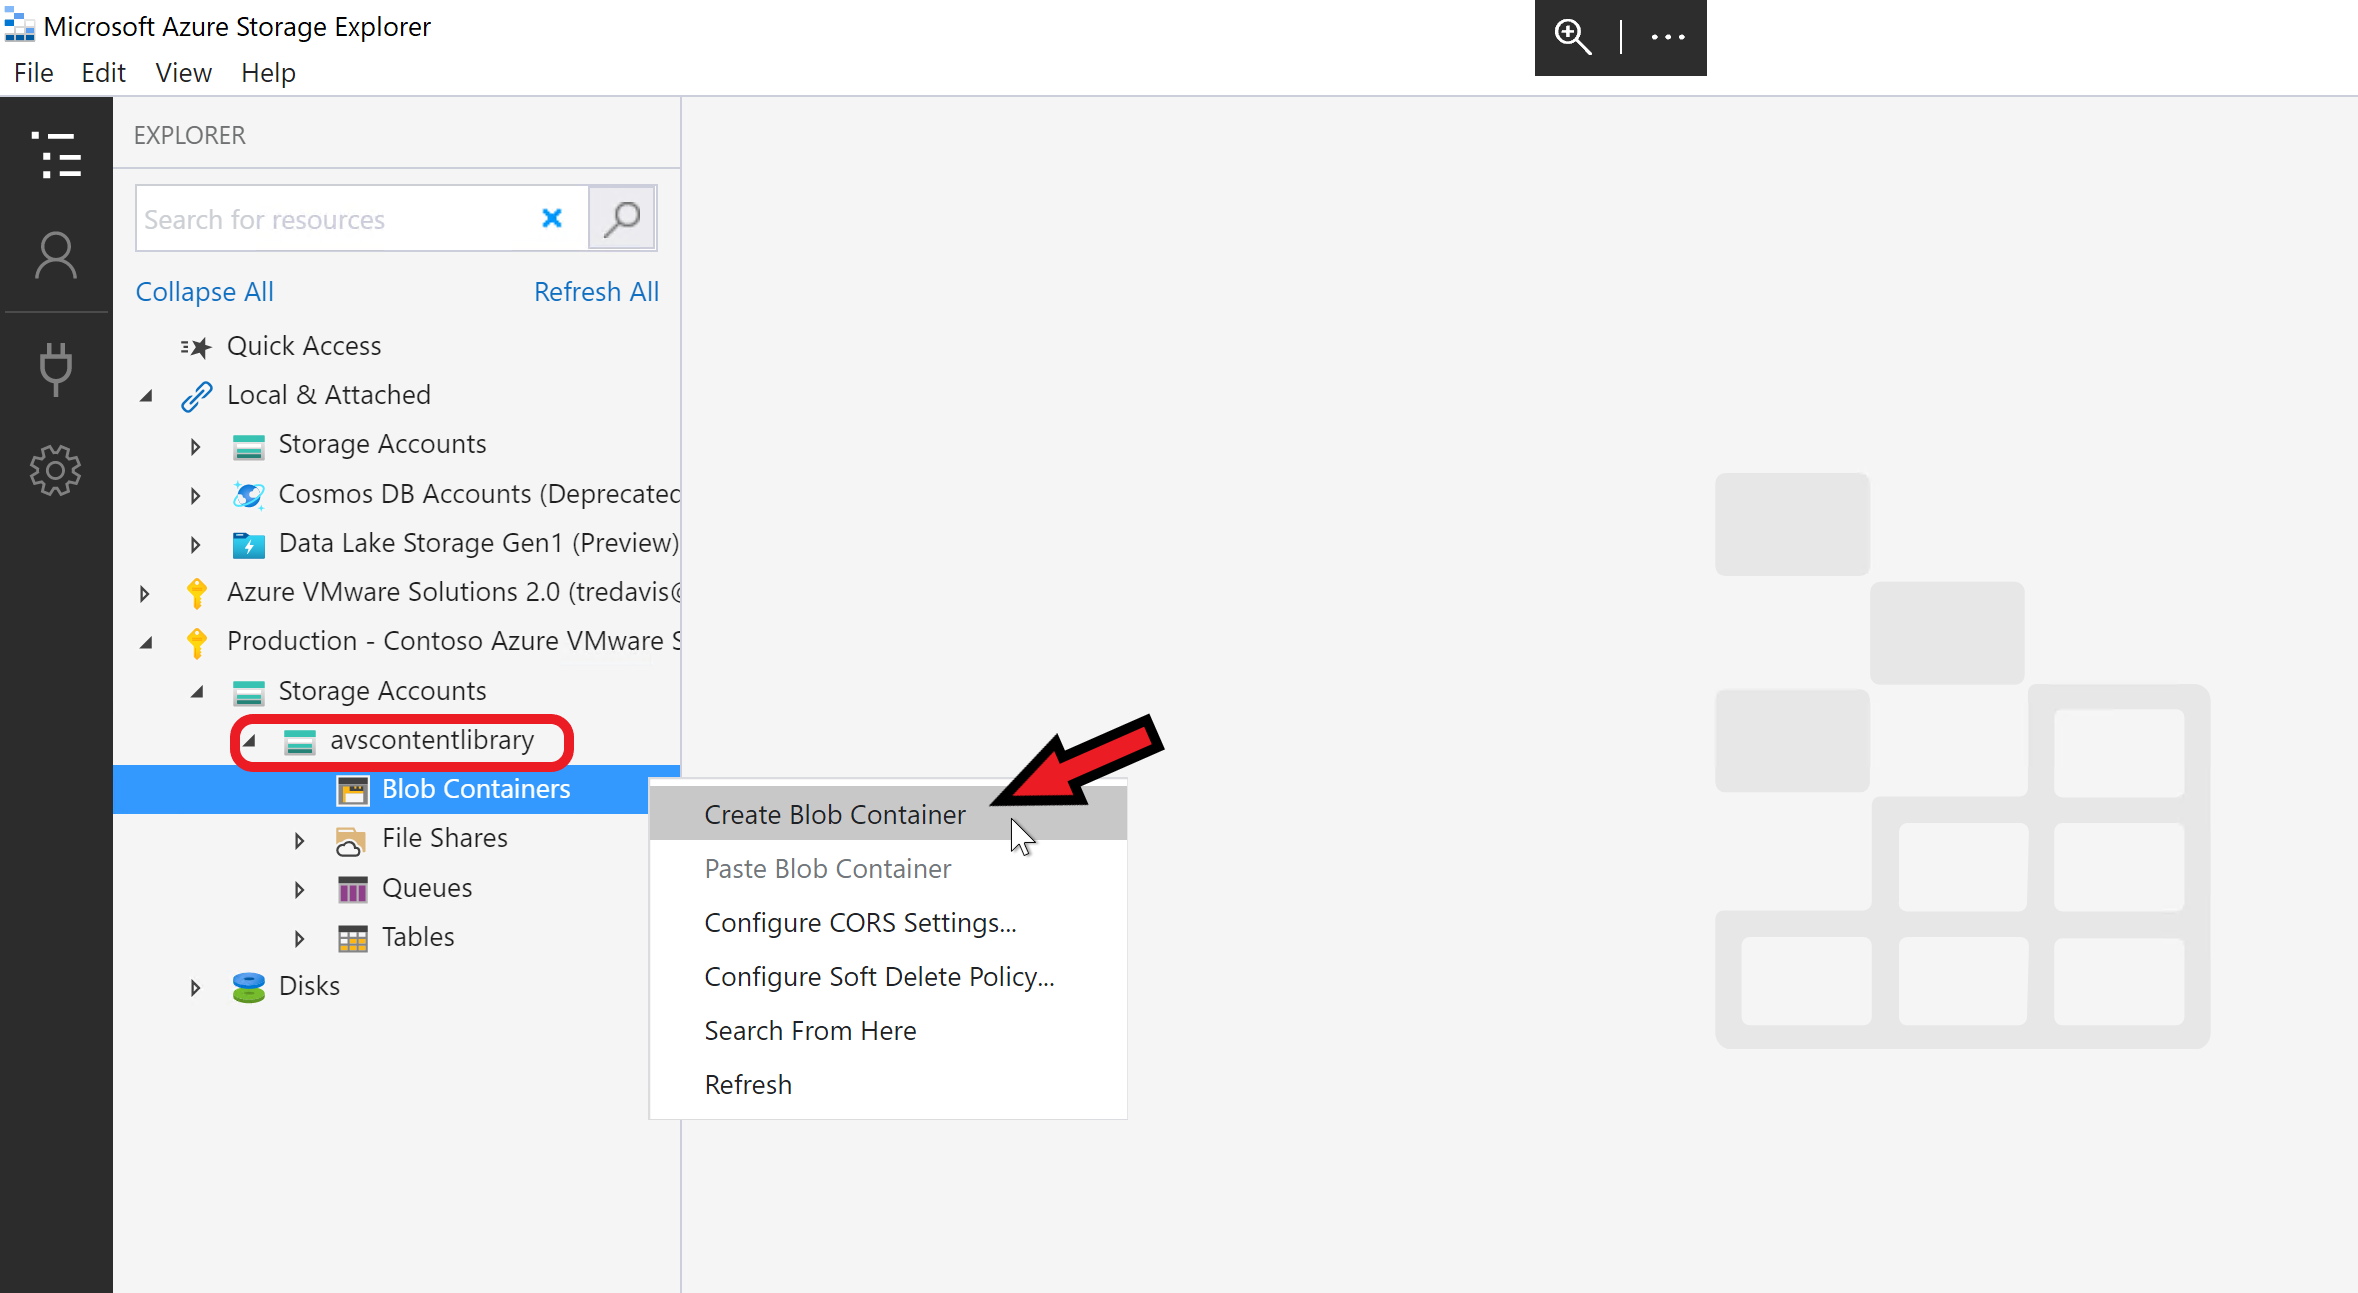
At this point I’ve moved from using the Azure portal to using the Azure Storage Explorer, in my view it’s the easiest way to manage the storage account, but there are other ways you can do this if you choose.
In Azure Storage Explorer log into your Azure account and find the storage account you just created and then choose to Create Blob Container. Then give the blob container a name.
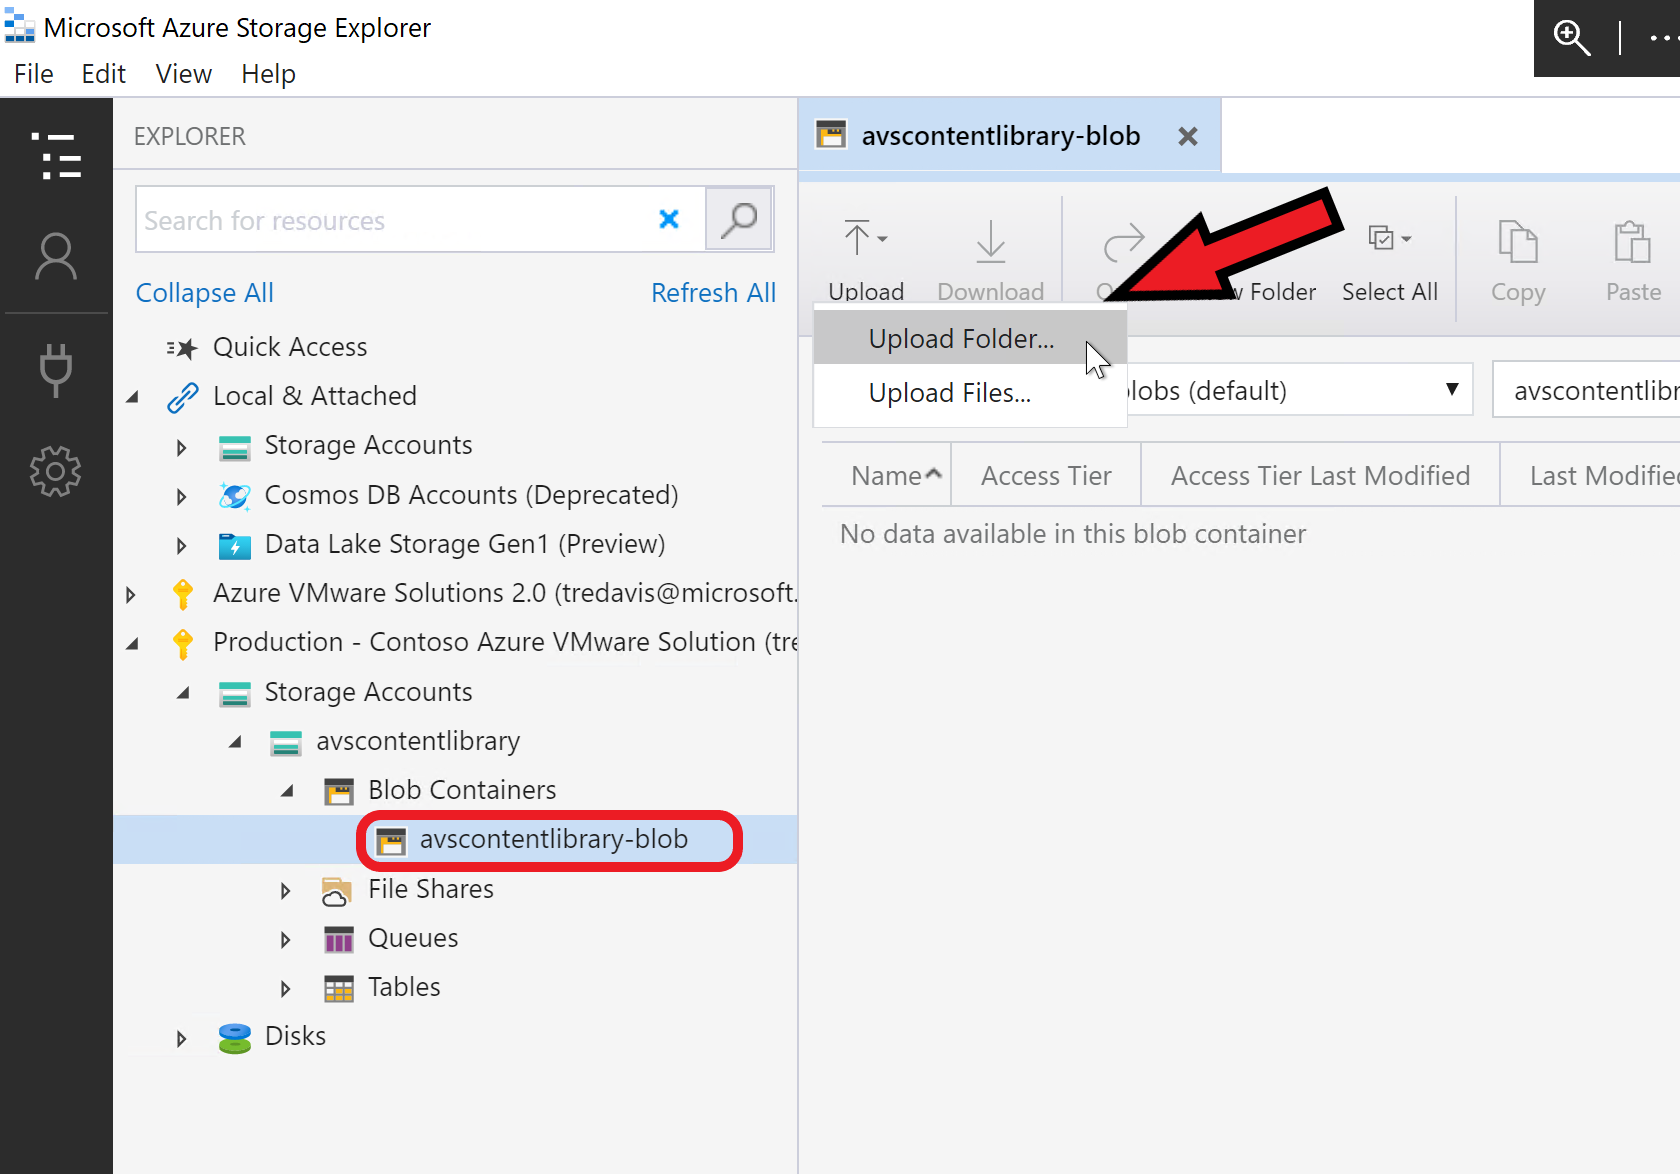
Step 4 - Upload Files
Now the blob container exists you need to upload the Content Library directory with all the sub-directories to the blob container. Do this using the upload folder option as shown here.
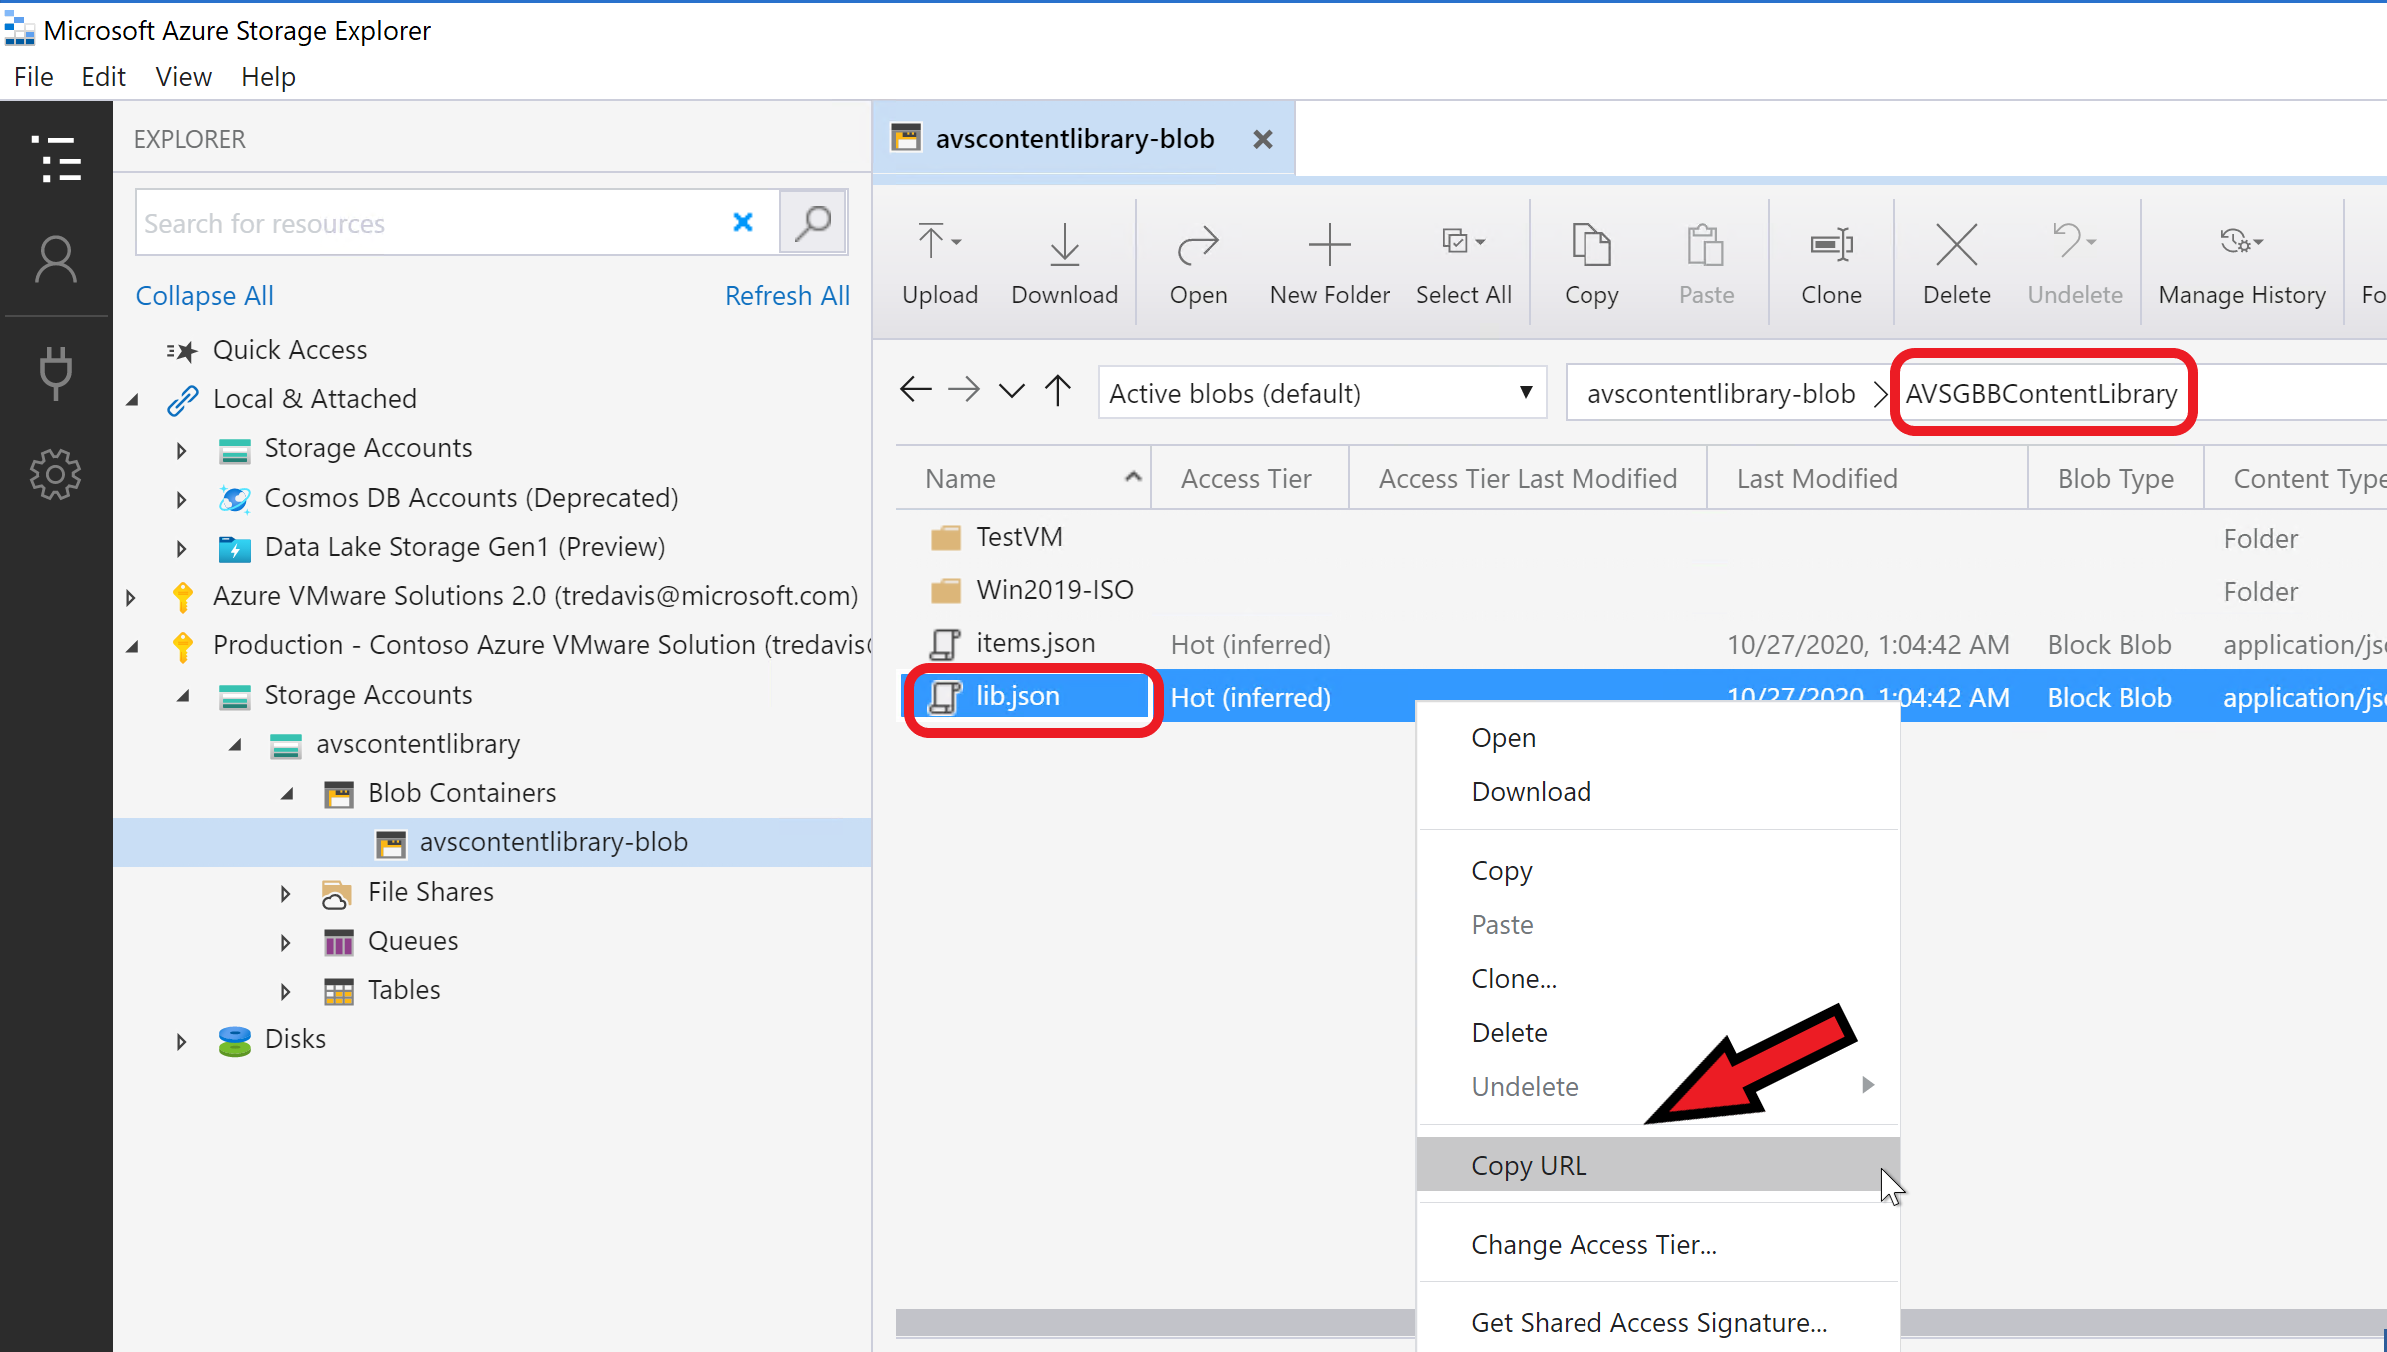
After the folder has been uploaded you will need to get a copy of the link to the lib.json file as shown here. Copy the link and save it for the next steps.
Step 5 - Create Content Library in vCenter
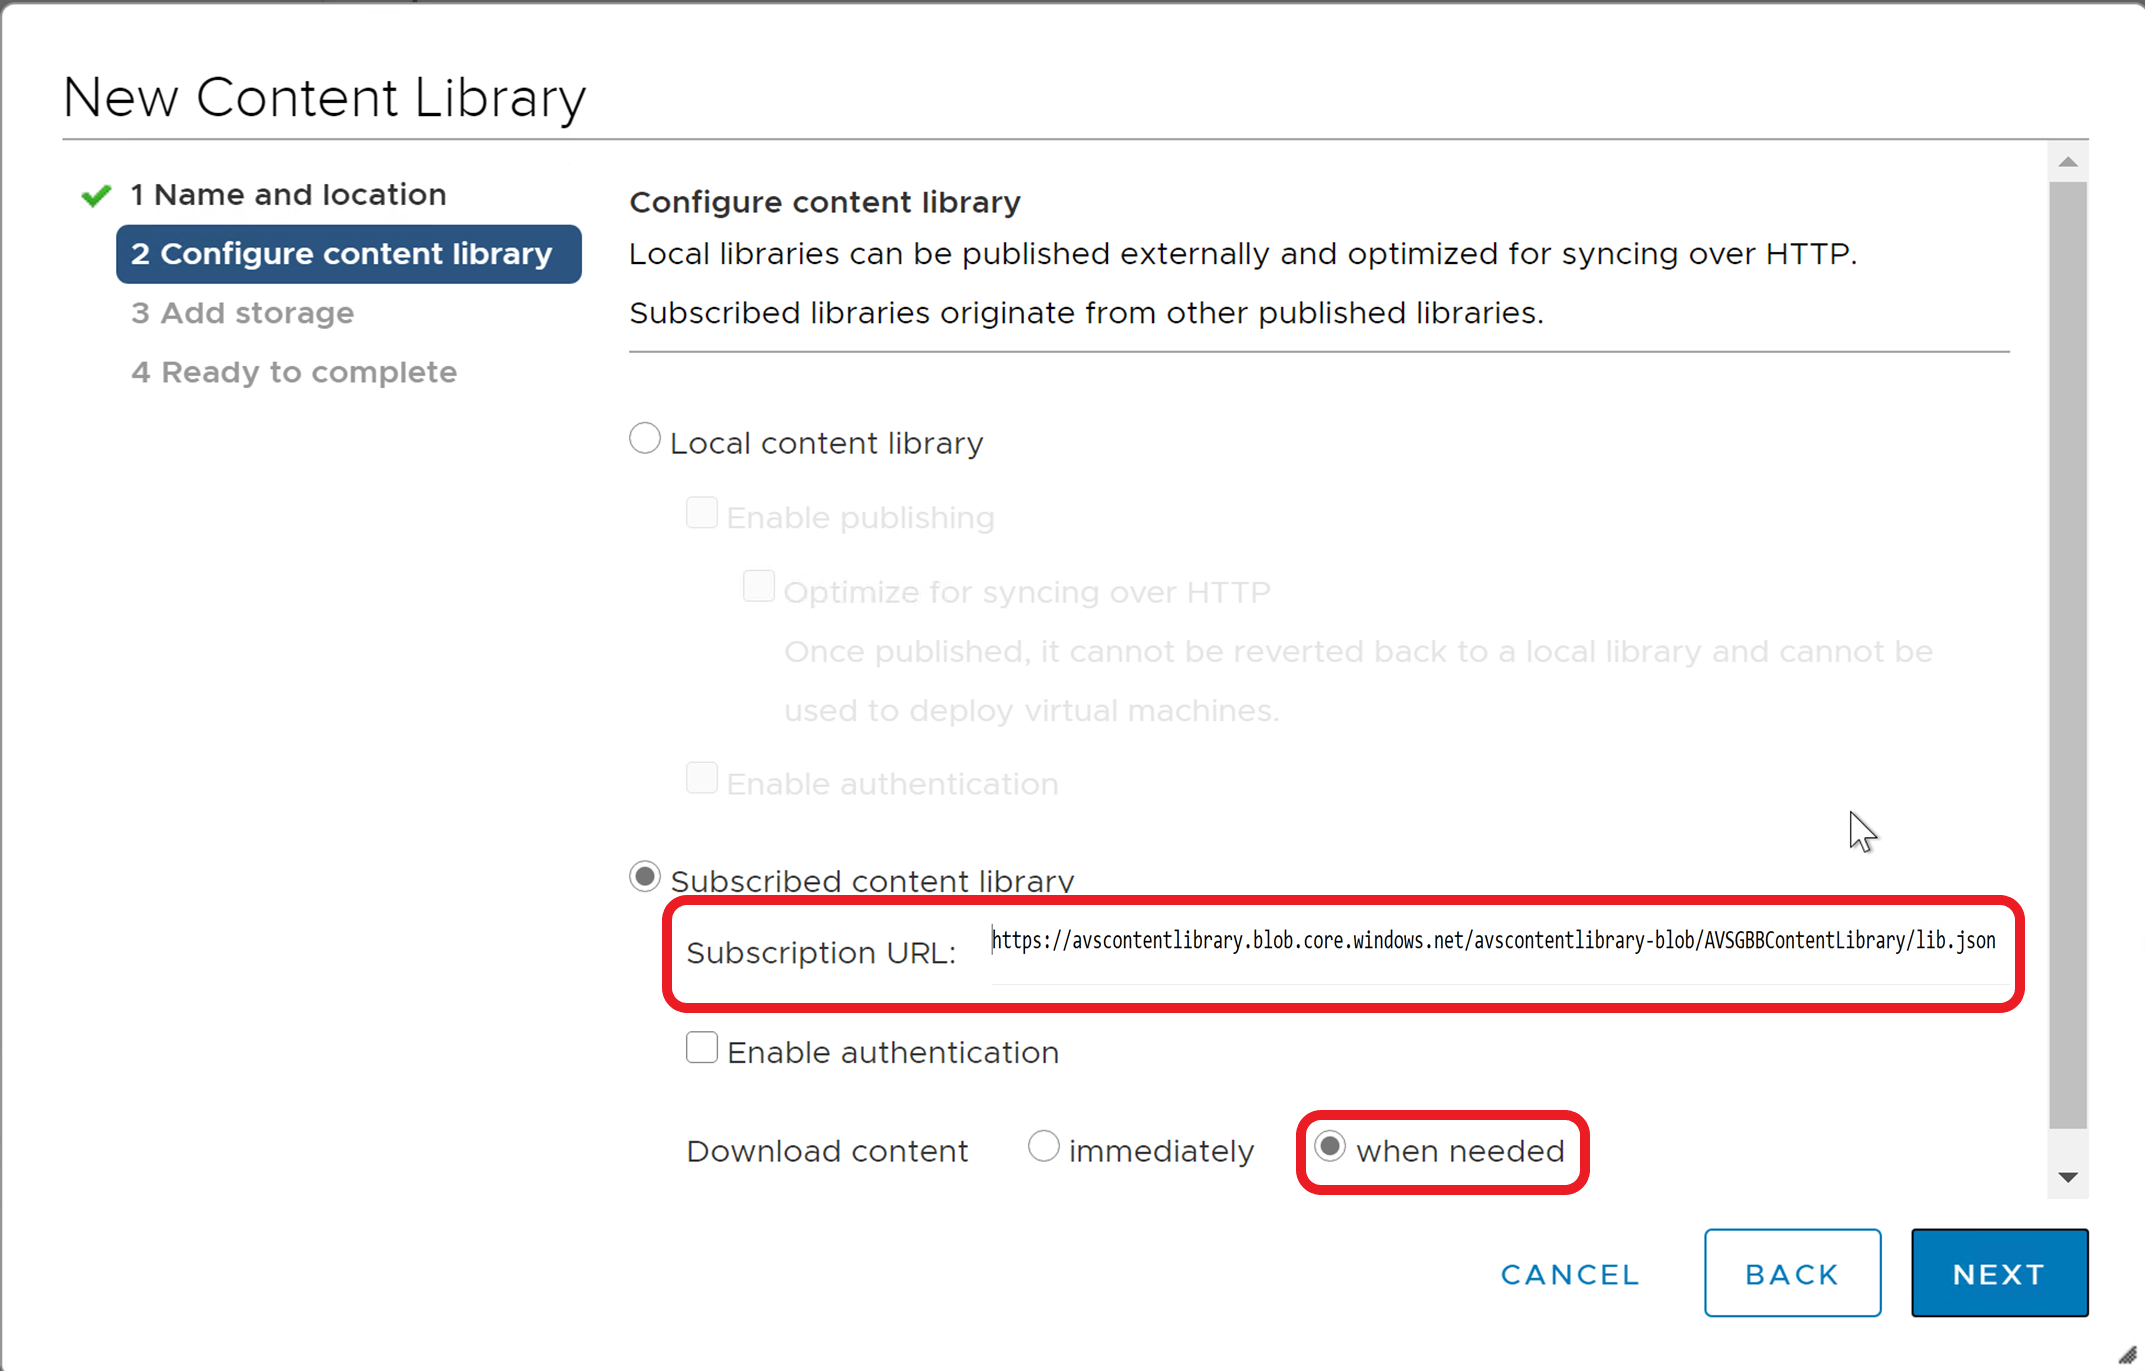
Log into your vCenter Server in Azure VMware Solution (or any vCenter) and subscribe to the content library using the link to the lib.json file you copied in the previous step.
Notice the option I selected was Download content when needed, this will only download content from Azure Blob Storage when the content library needs the file(s).
In the subsequent fields choose the options you prefer.
After subscribing you should see the Content Library with all the items you uploaded, but with a space consumed of 0 byte.
Now use this Content Library as you would normally.
[NOTE] Whenever you want to update the content library add content to the root directory on your local machine or update existing file(s), re-run the script as shown in the previous step and upload or re-upload anything which has changed.